If you optimized your graphics in the workspace using the Optimize panel and the Color Table panel, you can use File > Export to export your graphic. This bypasses the Export Preview dialog box and opens the Export dialog box.
To export an image:
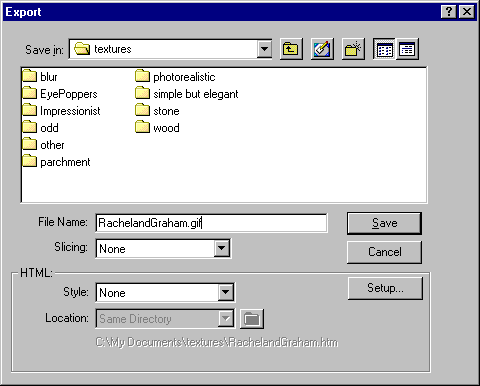
| 1 | Choose File > Export. |
| 2 | Choose a location for exported files. |
| The location is the folder where the exported images will be placed. Typically, the best location is a folder within your local site. | |
| 3 | Name the file. |
| For more information about naming multiple files, see Naming slices. | |
| 4 | Choose slicing options. See Exporting sliced objects. |
| 5 | Choose an HTML style that corresponds to the HTML editor. |
| 6 | Choose a location for the HTML file: |
| Same Directory exports the HTML to the same folder as the image files. | |
| One Level Up exports the HTML file to one folder above the image files. This is the most common location. | |
| Custom allows you to specify a location for the HTML. | |
| Copy to Clipboard exports the HTML information to the Clipboard rather than to a file, so that you can paste it directly into an HTML editor. | |
Note: Fireworks automatically generates links between the HTML file and the images.
| 7 | Click Save (Windows) or Export (Macintosh). |